%20Devum%20Logo.svg "(D) Devum Logo")


Welcome!
So, you're looking to dive into the world of low-code and want to get started with your app-building journey with Devum?
Whether you're an experienced software engineer or an aspiring Citizen Developer, this article will provide you with everything you need to know to get started.
How does Devum work?
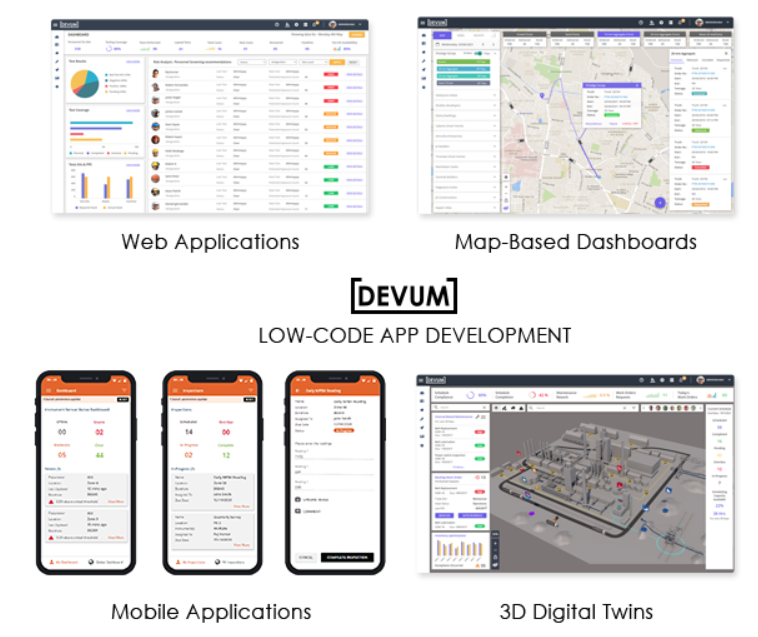
Devum facilitates the creation of web and/or mobile apps. The platform functions as a SaaS, which is hosted by default on our AWS-Powered Devum Cloud Infrastructure. If you prefer to use your own servers or a non-AWS cloud provider - no worries, Devum supports multi-tenancy options.
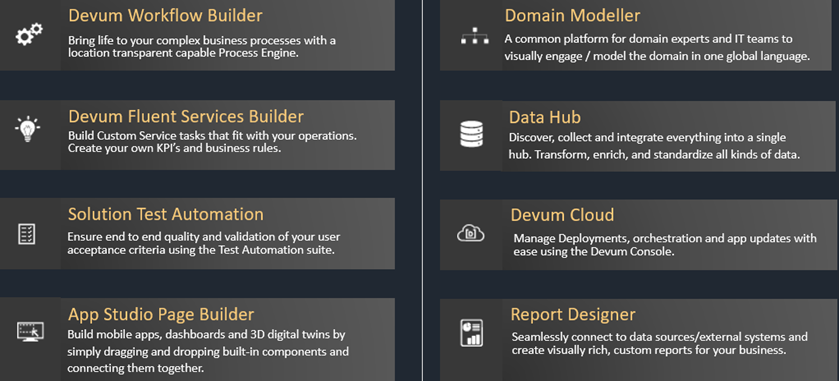
Devum Features
Devum is comprised of 2 core platforms, App Studio and Devum Console.
Devum console is an IT Admin / DevOps platform designed for you to manage your Devum subscription and server resources in one convenient dashboard.
App Studio is where all the app-building magic occurs and is comprised of various specialised functional modules which all form the building blocks of your future app.
Getting Started
Here is a 10 step overview of the high-level app building process.
1. Sign Up for Devum - it's Free!
That's right, we do offer a free version of Devum and it has all the features required to build an app. The only limitation is on the scope and server resources which may be required for enterprise-grade apps. Should you wish to opt-in on one of our paid plans, you can upgrade (or downgrade) seamlessly using Devum console. There are no lock-ins and you can opt out at any time.
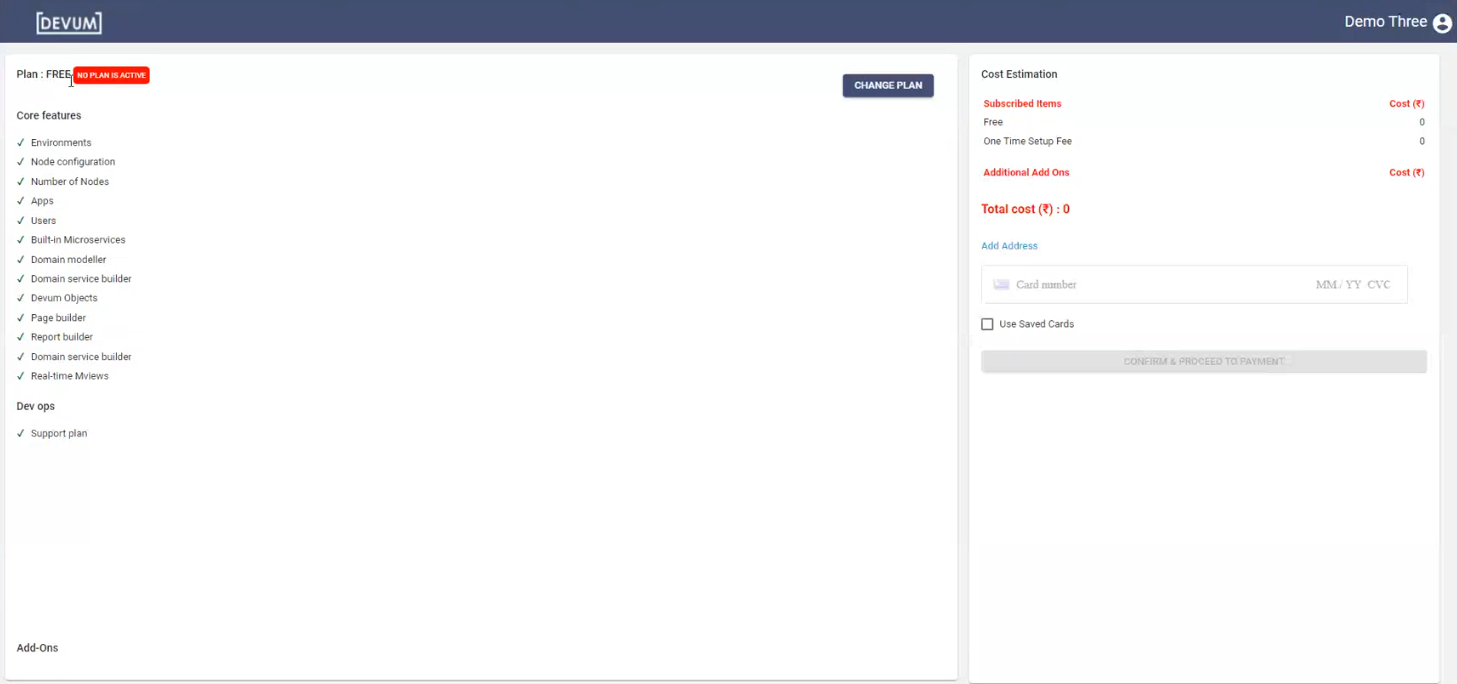 A newly created Devum Console subscription
Once your sign up process has been approved you will receive a welcome email with your Devum console credentials, Once inside you opt for a paid subscription with its enhanced benefits or proceed with a few basic configurations to generate the environment where the app-building magic will take place. Don't worry - we offer a comprehensive guide for getting this setup.
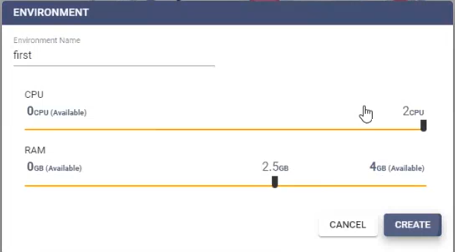 Creating an Environment In Devum Console
If you haven't done so already, Sign Up with Devum today, it only takes a few minutes!
2. Plan Ahead
It's a good idea to have a clear vision of what sort of app you want to build. There are many best practices that professional software developers use when it comes to this. You may wish to create a project plan with clearly defined deliverables and uses cases and then use Devum to fulfil those requirements.
Initially, you may want to at least consider who will be building the app, as you will be required to create developer user accounts for them in the next step - here is a checklist of recommended actions to prepare for your app-building journey
- Set clear goals
- Define the business requirement clearly
- Map out your business processes - as is and to be
- Create use cases for your app solution
- Create conceptual mock-ups of your interface design
- Utilise a project plan to map out the steps needed
- Remember - the platform is flexible so you should be too!
3. Initial Admin Setup
Now that you've created your environment in Devum console and all its associated settings, you will receive a Devum App Studio welcome e-mail with your initial super admin user credentials.
You will need to register your app first under App Studio admin. This is a quick step and will only take a minute or two. Thereafter you can add user accounts and define roles and permissions for them. There are some global app settings which can be configured but some of these can also be done at a later stage before your app goes live. Devum also offers a host of app templates which you can use to jumpstart your app-building. Simply select the template you want and then customise it according to your needs.
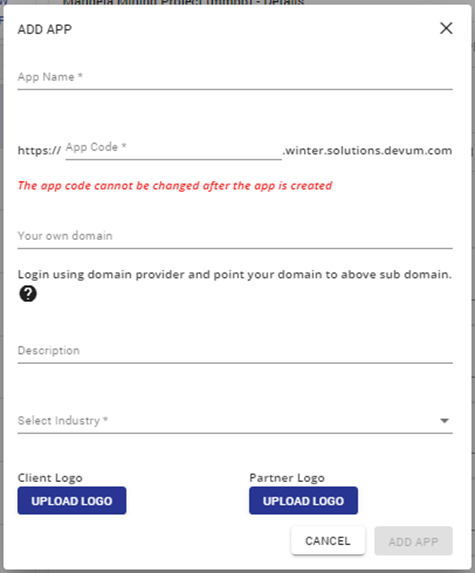
Adding an App
You may also want to use this opportunity to register and install any microservices which you registered in Devum console, remember that Devum has a massive library of built-in functions to leverage. Don't worry, this can be done at a later stage as well.
4. Build that Interface!
This is where things start to get really interesting. Head over to App Studio page builder where you can get to work on composing your app interface. After selecting Add new page you will be required to select what type of app or interface you want to build, be it a web or mobile app or even a report.
After selecting your preference, you will need to define a layout, and then add controls and visual elements to your page as seen below.
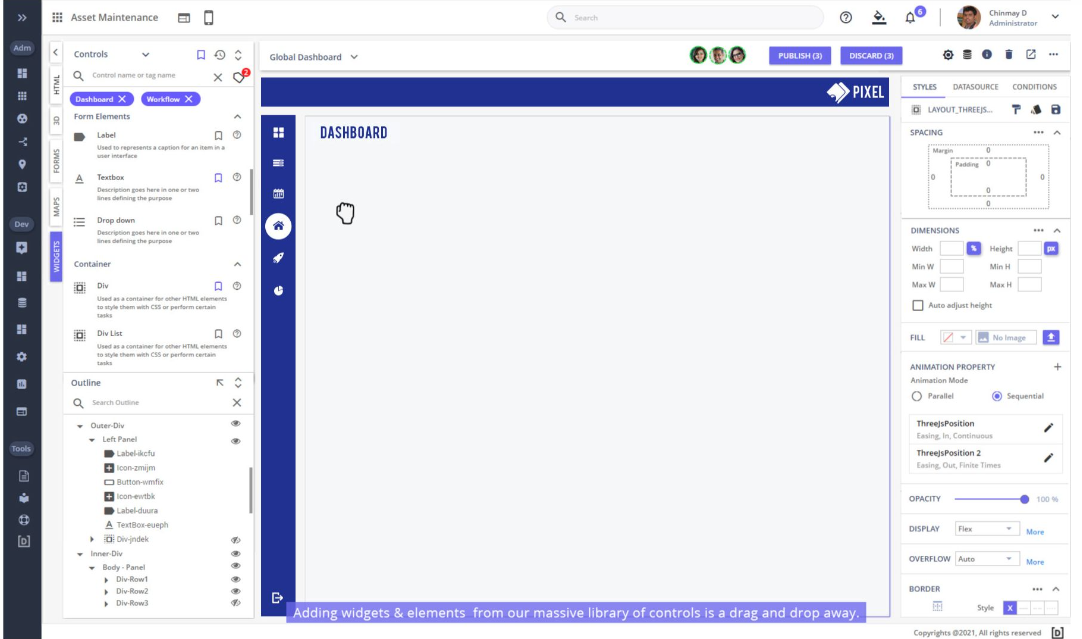
App Interface design in progress using Devum Page Builder
Thereafter you can apply conditions, behaviours and events to your interface to make it more dynamic and interactive to meet your functional needs.
You'll need to come back to this section to bind your data to your interface.
5. Construct Your Data Model
All apps are driven by data and this is where you can add the required database tables (entity schemas) and define how they relate to each other using Domain Modeller's visual design canvas.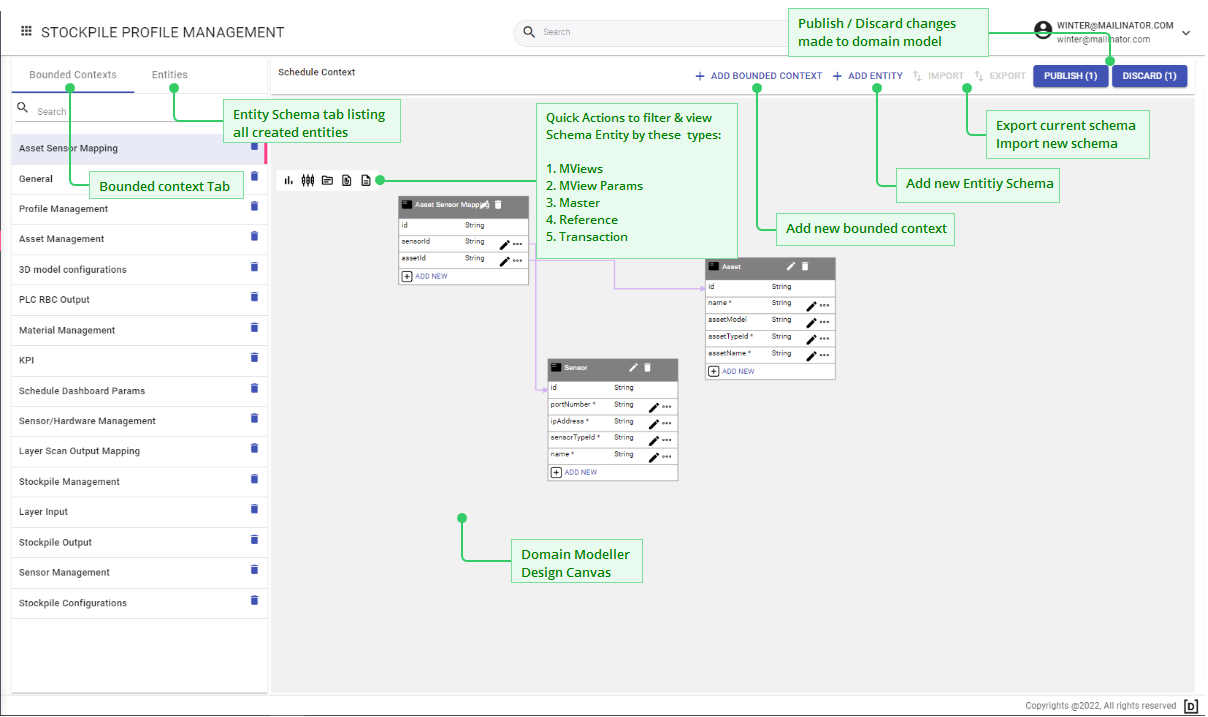
Domain Modeller allows you to model your database table according to your business domain
6. Compose Your Processes
Everything in Devum is visually designed and Devum workflow builder is no exception. You can map out all the required app processes exactly as you would map out a workflow or business process using a visual process designer. This can be embedded into your interface and app functionality where required.
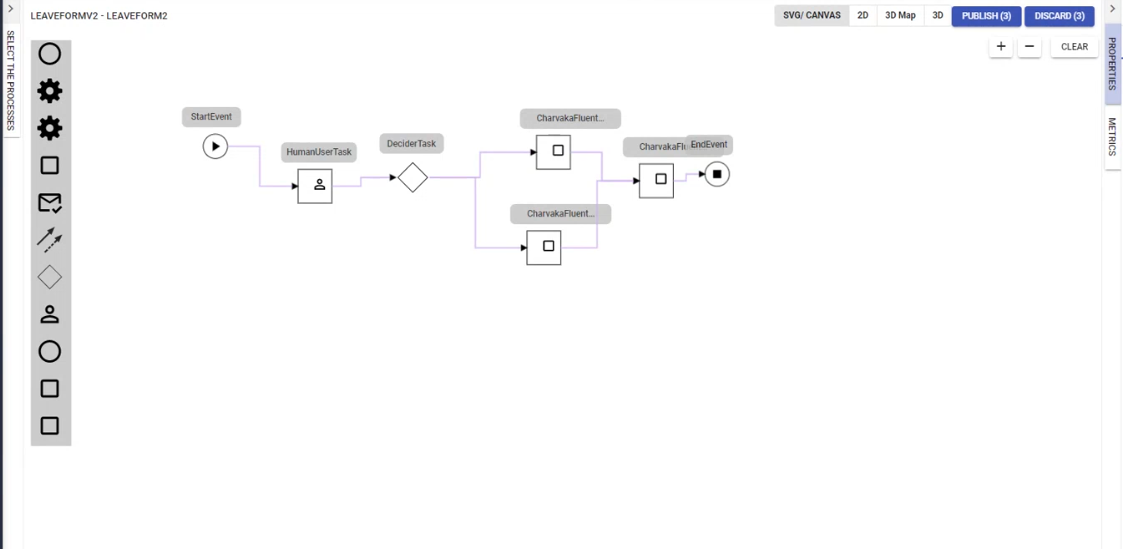
Process Building using Devum's visual designer
7. Incorporate Domain Services
Devum Fluent services empower Citizen developers to fluently, visually and safely build a wide variety of services and deploy them to add rich Business Intelligence to their apps, incorporate crucial process flows or the mission-critical Enterprise Service Bus.
Fluent services uses Devum's own DevL language which is a simplified form of Pseudocode, which is equivalent in complexity to commonly spreadsheet formulas. We offer detailed guides to assist you with getting the most out of this powerful feature.
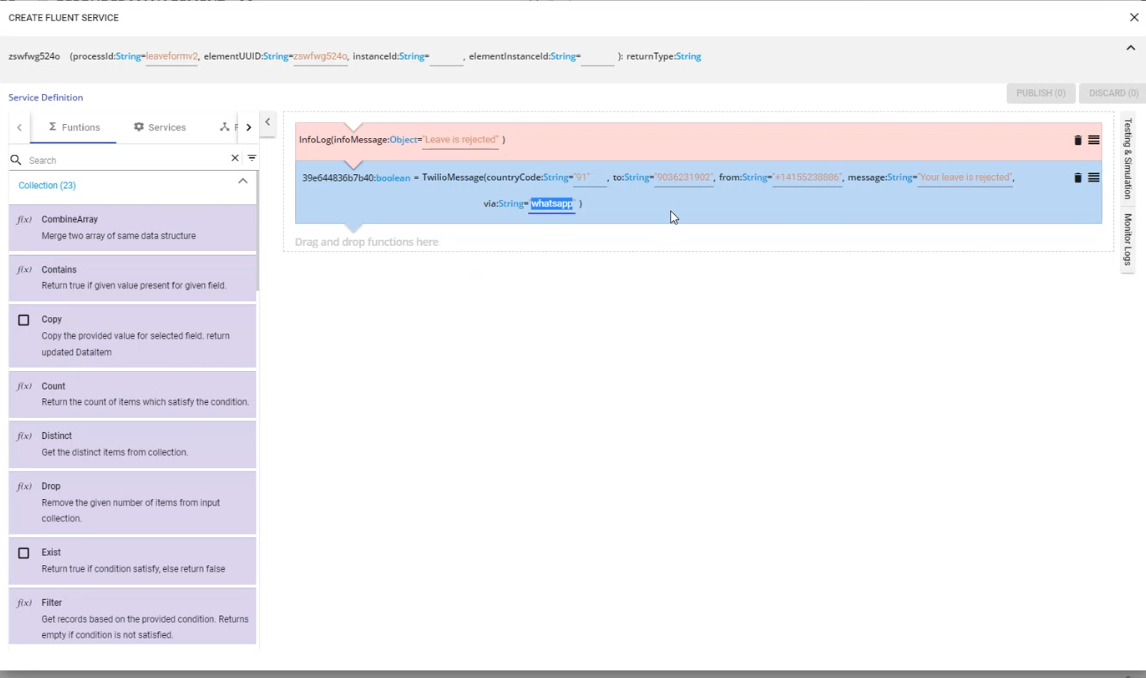
Devum's Fluent Services Composer
8. Bind Your Data to Your App
Now that you've created your data models, processes and created some domain services you are now ready to bind your data to your app designs and customise your forms according to your needs. In reality, this is a process which is typically not linear -you may interchange the preceding 4 or 5 app steps as you progress in building your app.
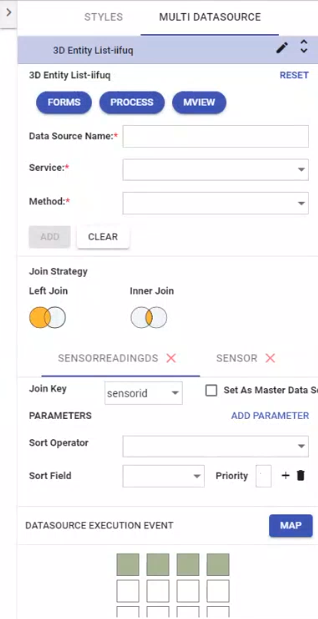
Data binding and aggregation - connecting your data to your app interface.
9. Test and Validate
It's a good idea to test and validate your app before you go live as bugs and small errors are an unavoidable reality of app building, even in low-code.
Luckily, Devum provides the means to mock data sources and run simulations to see how your app would run in the real world. This can all be achieved using our process engine/workflow builder and creating simple test cases.
10. Deploy and Go Live!
Now that your app has been built and tested and validated you're ready to go live.
Deployment is a breeze and no complex processes and steps are required to start using your app. Invite app users, assign their permissions and set up some of the app's master data if required.
the great thing about your app is you can always go back and change something as your needs and business requirements grow!
Devum allows you to create any app you can conceive of!
Want to dive a little deeper? Check out some of Devums App Building resources and guides below!
Our Comprehensive User Guide - In-Depth Tutorials on how to use Devum
Devum Community - A place to share tips or assist other Devum users
Want to learn more? Get in touch with us and we will be happy to assist you.


